|
<< Click to Display Table of Contents >> Windows |
  
|
|
<< Click to Display Table of Contents >> Windows |
  
|
To install TeslaSCADA IDE download EXE package for your operating system, then you need to run the installation file:

Then the window for selecting directories for the main program files and user data will be displayed. It is recommended to install the "system" part of TeslaSCADA IDE to the system drive in the "C:\TeslaSCADA_IDE\" folder, and the folder with user files can be selected at the user's discretion. The main thing is that the OS allows the creation, modification and deletion of files in this folder without requiring administrator rights. Also if you want to use Web Server the path shouldn't contain white spaces. After selecting the directories, click "Next":

After clicking "Next" application will be installed:

After the installation is complete, TeslaSCADA IDE will be started automatically:

To study folder where you install TeslaSCADA IDE open it:

Consider its contents:
▪app - contains application information.
▪runtime - contains JRE. TeslaSCADA based on Java language. The folder runtime contains JRE for Windows environment. If you don't use Web server in your project you don't need to install Java separately. TeslaSCADA IDE will work any way. If you want to use Web server in your project you have to install Java on your PC.
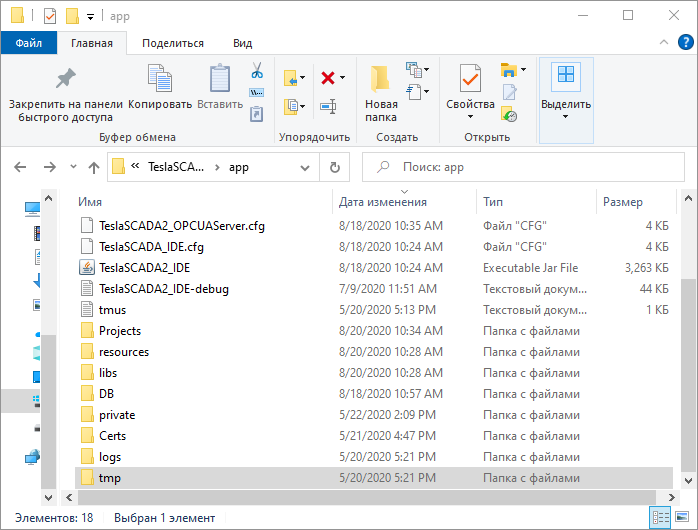
Let's study app folder:

Consider its contents:
▪Projects - default project folder of TeslaSCADA IDE. You can save projects in other folders.
▪DB - project contains SQL Lite databases. If you use SQL Lite databases for history, events and recipes they will be stored in this folder.
▪private - contains certificates and keys for OPC UA and MQTT protocols if you use OPC UA or MQTT clients in your project.
▪Certs - contains certificates and keys for OPC UA server if you use it.
▪TeslaSCADA_IDE-debug - contains Log information about application working.
▪Other folders and files - related to working of application and Web server.
Install TeslaSCADA2 on Windows